Self-deposit guide
At this point you should have:
- an ANC account and a dataset project (set up in Phase 1 of your route)
- a BIDS-compliant dataset that satisfies the ANC Data Format Requirements
- metadata files filled in (
README.md,dataset_description.json,CITATION.cff,participants.tsv,participants.json)
If any of these are not yet in place, go back to the earlier phases of your route before continuing.
Read this guide until the end before you start depositing your data.
The ANC is built with GitLab which uses Git for version control. Although our guides explain the commands and functionalities of these systems, you should have basic skills in Git and shell usage, for example bash.
Understand the dataset project files
A new dataset project comes with several predefined files. Please make yourself familiar with them.
Data curation and stewardship
The ANC data stewards assist you in the data deposition and review changes to your data. They learn your data in the process, help you resolve any issues, and offer metadata improvements.
The "Dataset Status" issue, labeled Dataset statusInitialized, specifies the data steward assigned to your dataset (Assignee) and serves as a communication channel with your data steward. Leave a comment there if you need any help.
ANC Task issues and metadata
A fresh dataset project comes with several predefined ANC Task issues, labeled ANC Task*, which guide you through adding metadata to your dataset. The descriptions of the issues provide you with the necessary instructions and links to further documentation. Always read the description before you start working.
Working with your data
Working with a data repository on GitLab requires using issues and merge requests. Creating an issue and a merge request before making changes ensures a clear and organized workflow. This process promotes collaboration, maintains data quality, and helps manage the dataset by keeping a detailed record of all changes and enabling reviews.
The basic GitLab workflow
- Create an issue
- Create a merge request
- Work on the issue
- View changes
- Request merge
Step 1: Create an issue
Whenever changes are required in the data repository, create an issue(1) describing the proposed changes.
- An issue can be seen as a tool for planning, documenting, and structuring work. It can also be used for discussions.
To do this, navigate to the repository and select Issues from the left-hand panel.
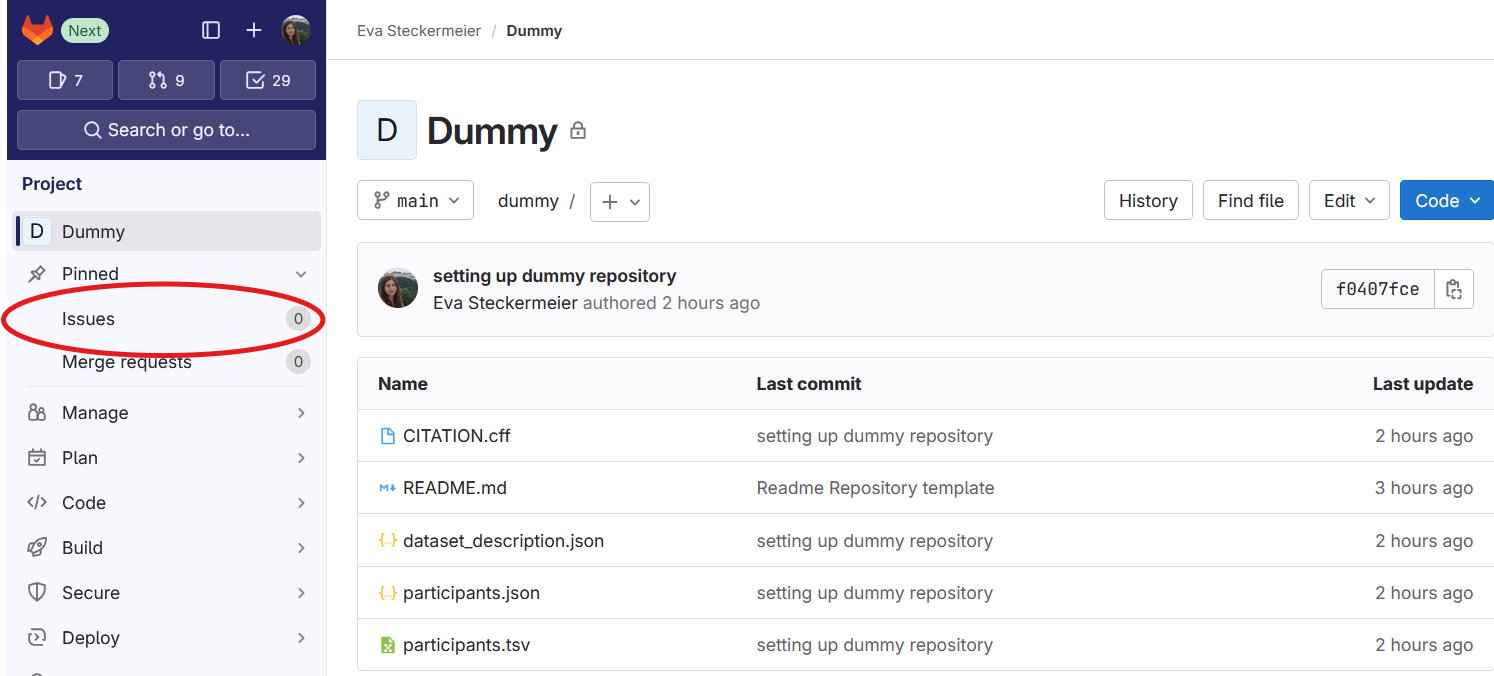
Then click on New issue.

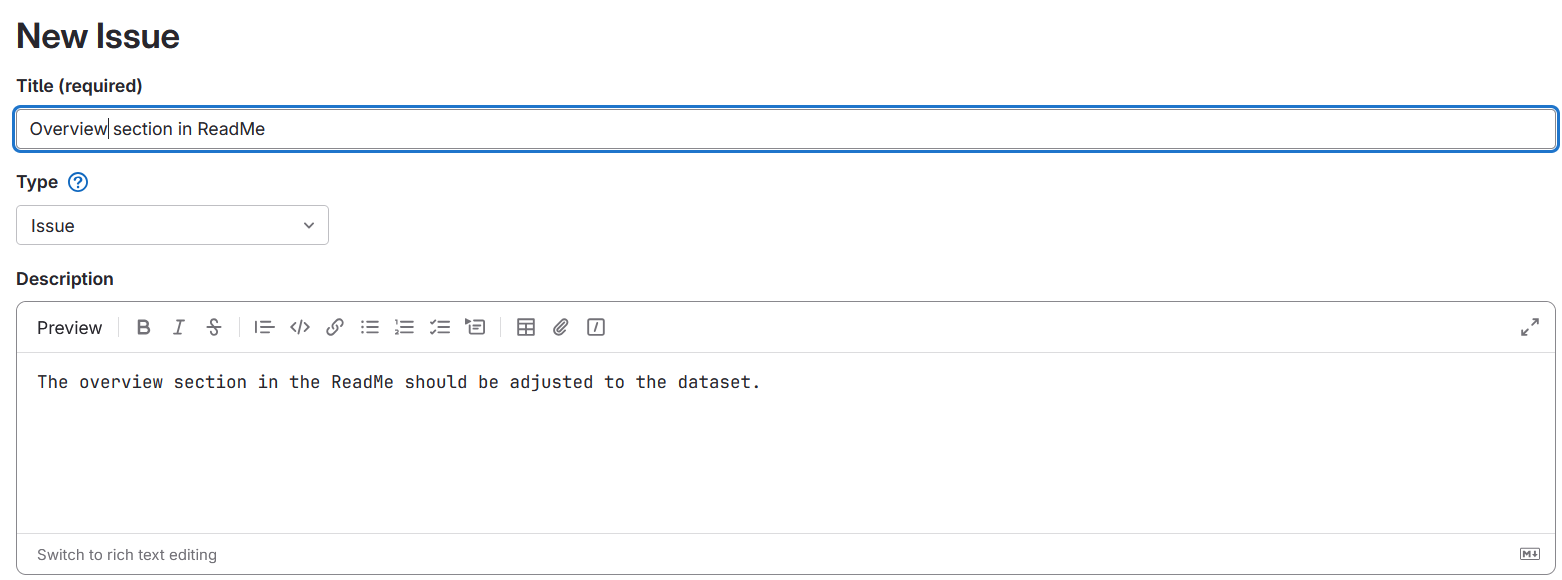
Create the issue by providing a title and a detailed description of the planned changes.
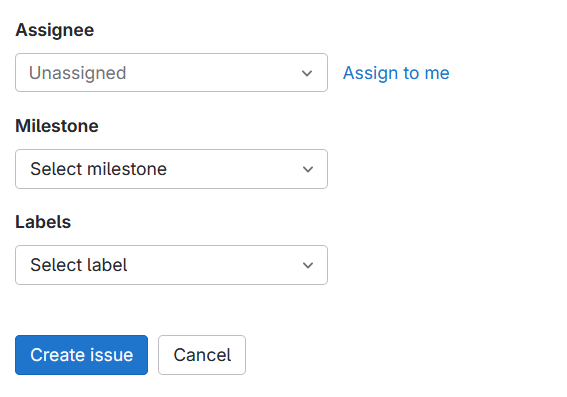
Assign the issue to the person who will work on the implementation of the changes. Finally, click Create issue at the bottom of the page.
Step 2: Create merge request
After creating an issue, the next step is to create a merge request. When you create a merge request for an issue on GitLab, two things happen. GitLab creates a new branch(1) of your data, and a merge request(2).
- The branch is a parallel version of the repository that allows you to work on changes without directly affecting the whole dataset.
- A merge request is a request to apply the changes that were made on one branch to another, usually the default or main branch of a repository. A merge request can start out as a draft and comes with a useful interface where you can review the current difference between two branches and where additional discussion can happen.
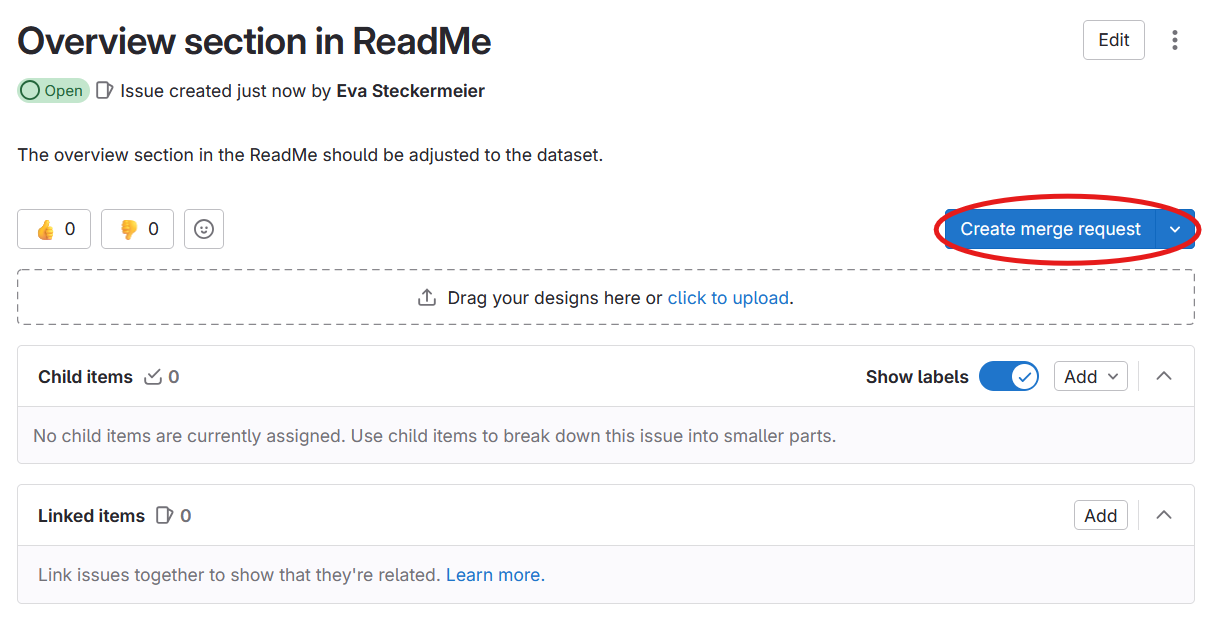
To create a merge request, navigate to your issue and click on Create merge request on the right-hand side.
Duplicate branches
Before clicking Create a merge request in the issue, ensure there is no existing branch for this issue, nor an existing merge request. The new branch is created immediately upon clicking Create merge request from the issue, while the merge request itself is not created until you confirm it on the next page. If you do not confirm the merge request here, there will only be an additional branch. When you create a merge request from the issue again this will result in a duplicate branch.
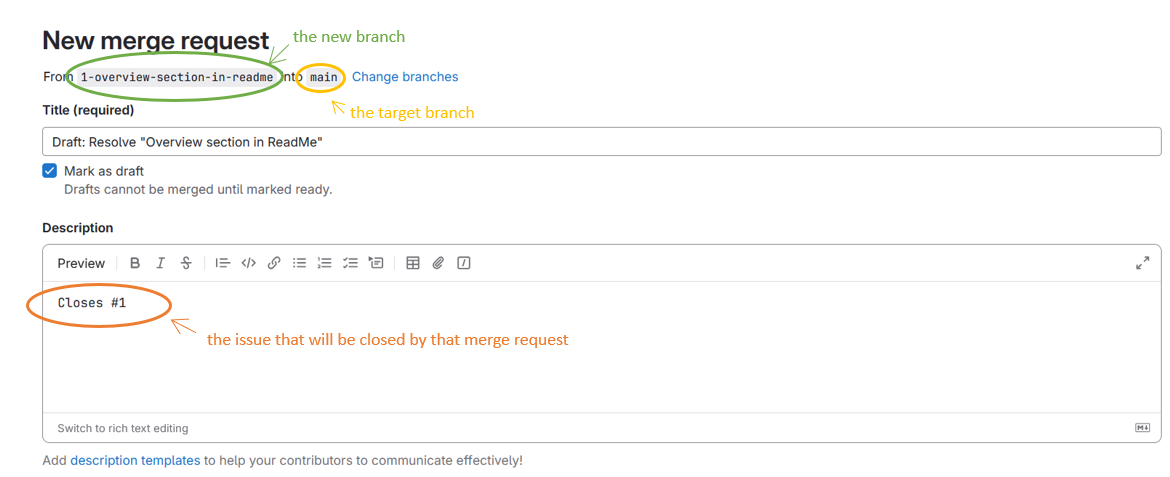
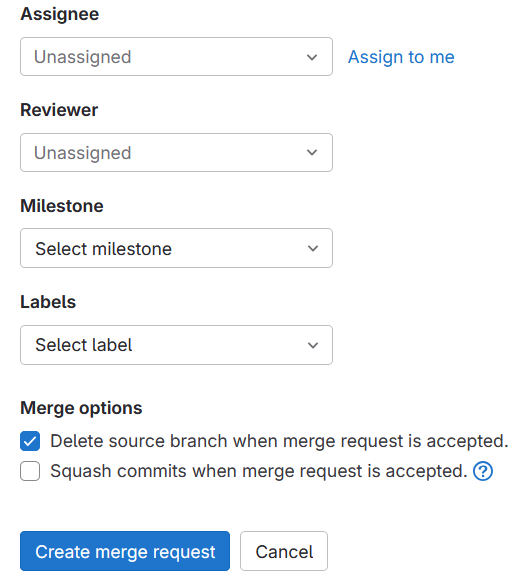
Now, assign the merge request to the person who will be working on it. Do not assign a reviewer at this stage. Only request a review once all changes for the issue have been implemented. Finally, click on Create merge request.
Step 3: Work on the issue
Depending on the type of changes, you can either use the Web IDE directly in GitLab, or work locally on the machine where your data resides. Ensure work is done on the branch associated with this specific merge request.
Add imaging data files using git commands locally
Use the local workflow to deposit participant data. Imaging files are stored using Git LFS, which is not available in GitLab's WebIDE.
This is a known GitLab issue.
Using the Web IDE
GitLab provides a simple way of editing regular files (e.g. .md, .tsv, .json) without making a local copy of the repository.
Don't change large files in the WebIDE
Due to a bug in GitLab it is currently not possible to make changes to large files in the WebIDE. Such files must always be handled locally. Changing these files in the WebIDE will corrupt their content. Large files are marked as LFS in the repository. They include NIfTI, image and audio files, among others.
Opening the Web IDE from a merge request
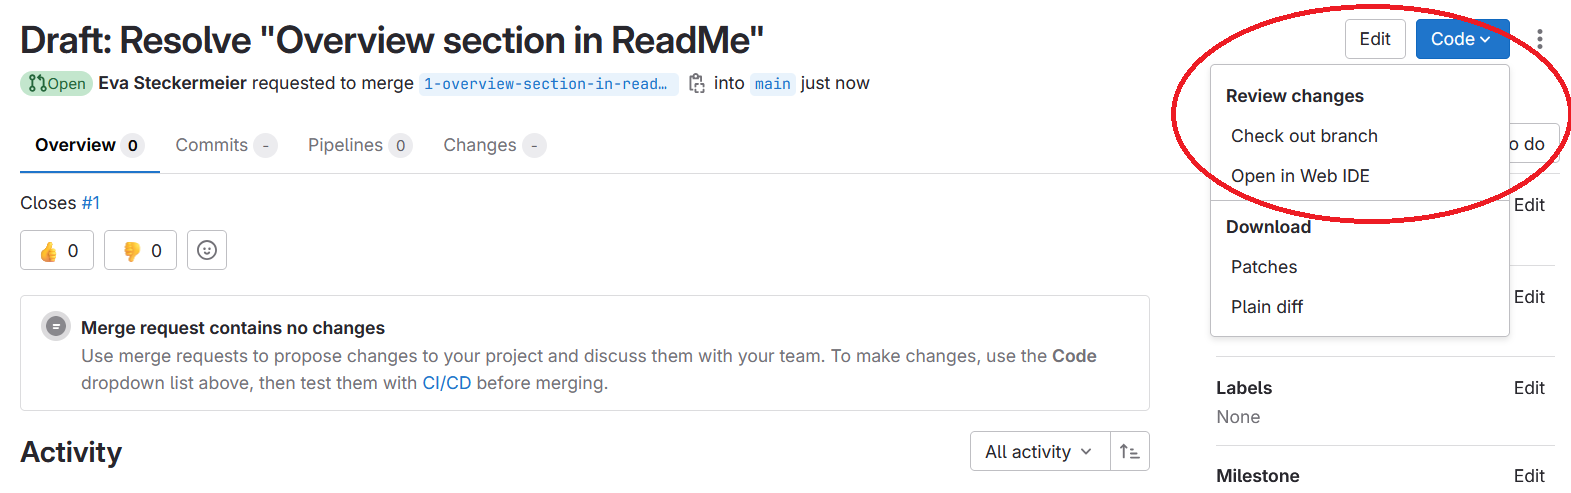
Navigate to the merge request you want to work on and click on the Code button on the right-hand side and select Open in Web IDE.
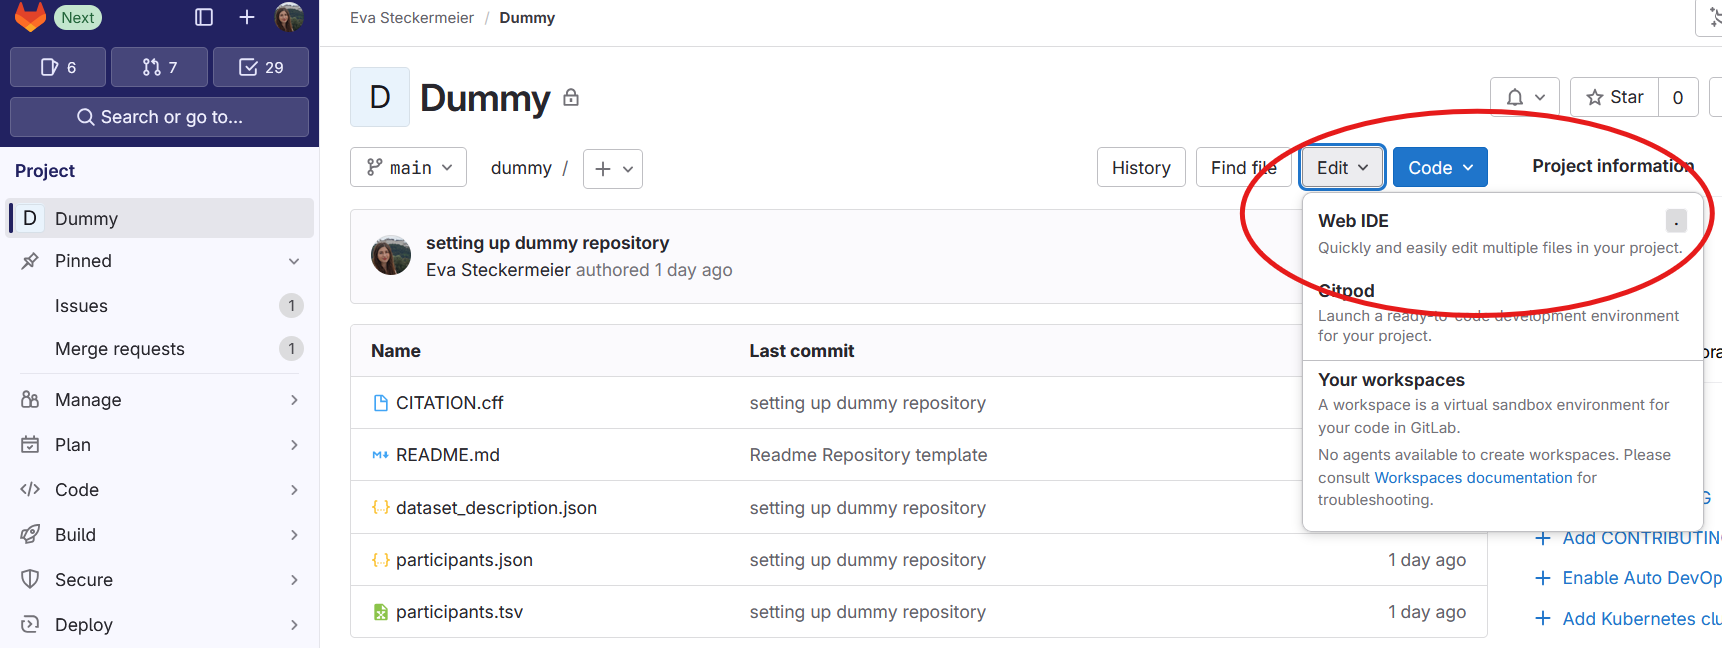
Opening the Web IDE from the repository
Click on the Edit button and select Web IDE.
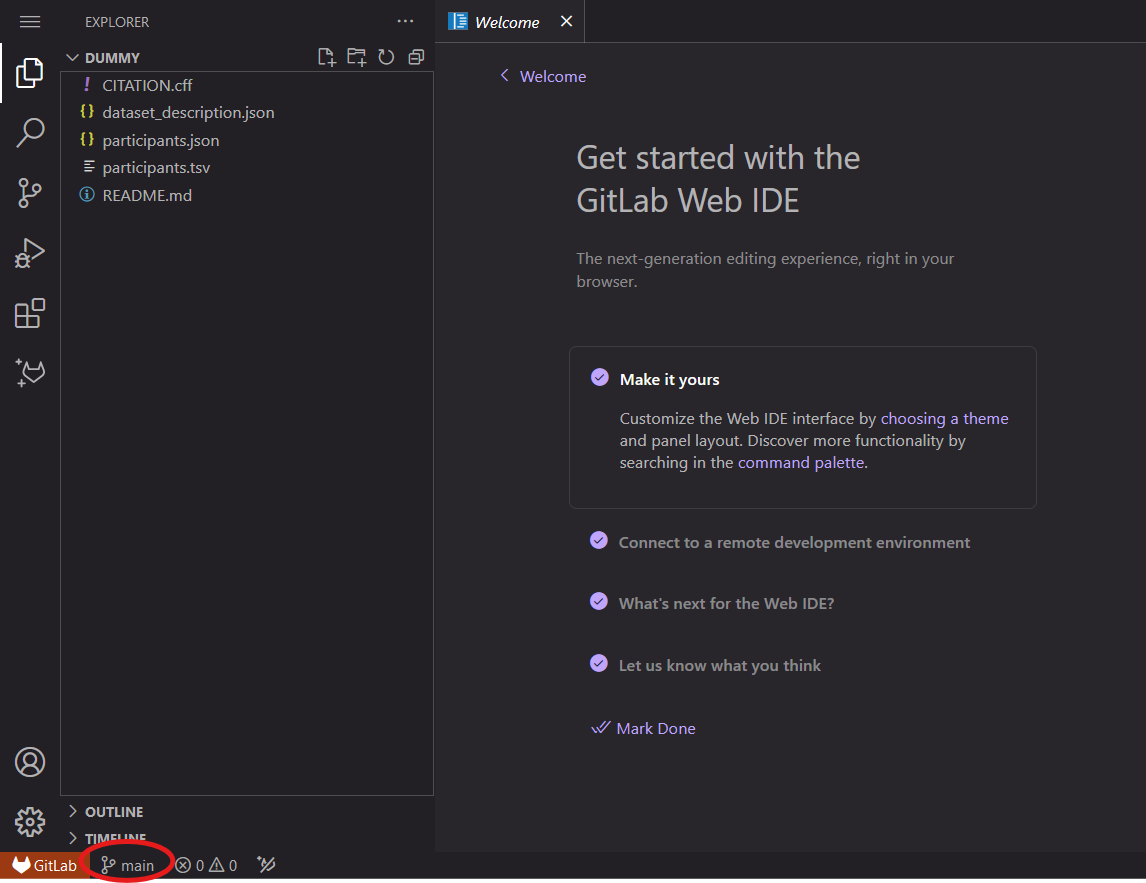
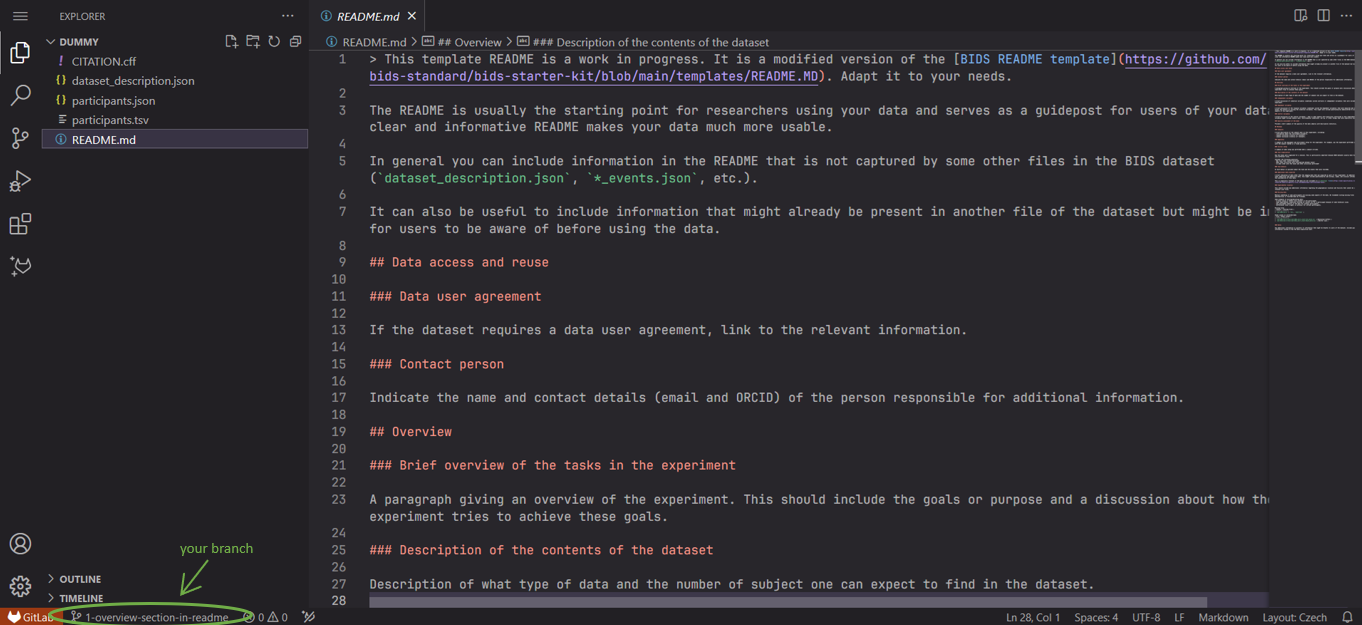
Always make sure you are working on the right branch!
If no branch was selected beforehand, the Web IDE opens on the main branch, which is displayed in the bottom left corner. By clicking on the branch name, a bar at the top of the screen will open, allowing you to select the branch you want to work on.
Working on files
The Web IDE functions similarly to Visual Studio Code, but without extensions. Various types of text files can be edited, and new files can be created or uploaded by right-clicking on the folder structure panel.
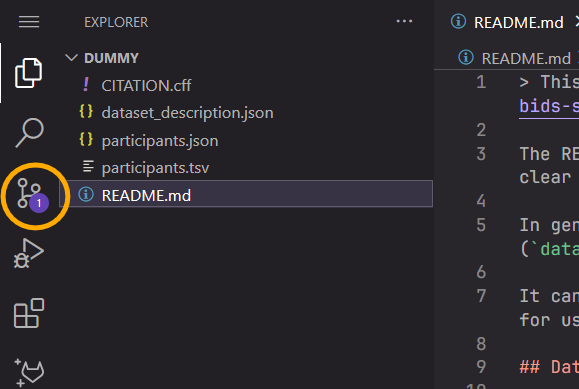
Committing changes
After modifying a file, a notification appears in the source control. Access the source control to commit(1) the changes by clicking on the symbol.
- By committing a change, you save them in the branch you are working on. Each commit should include a commit message describing what was implemented.
 →
→ 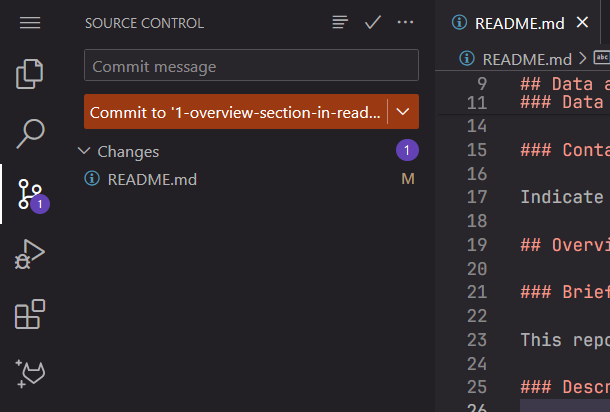
Make small commits that contain only a single change or very few changes. This enables better tracking and provides a clear overview of all modifications. Once the changes are committed, simply close the Web IDE.
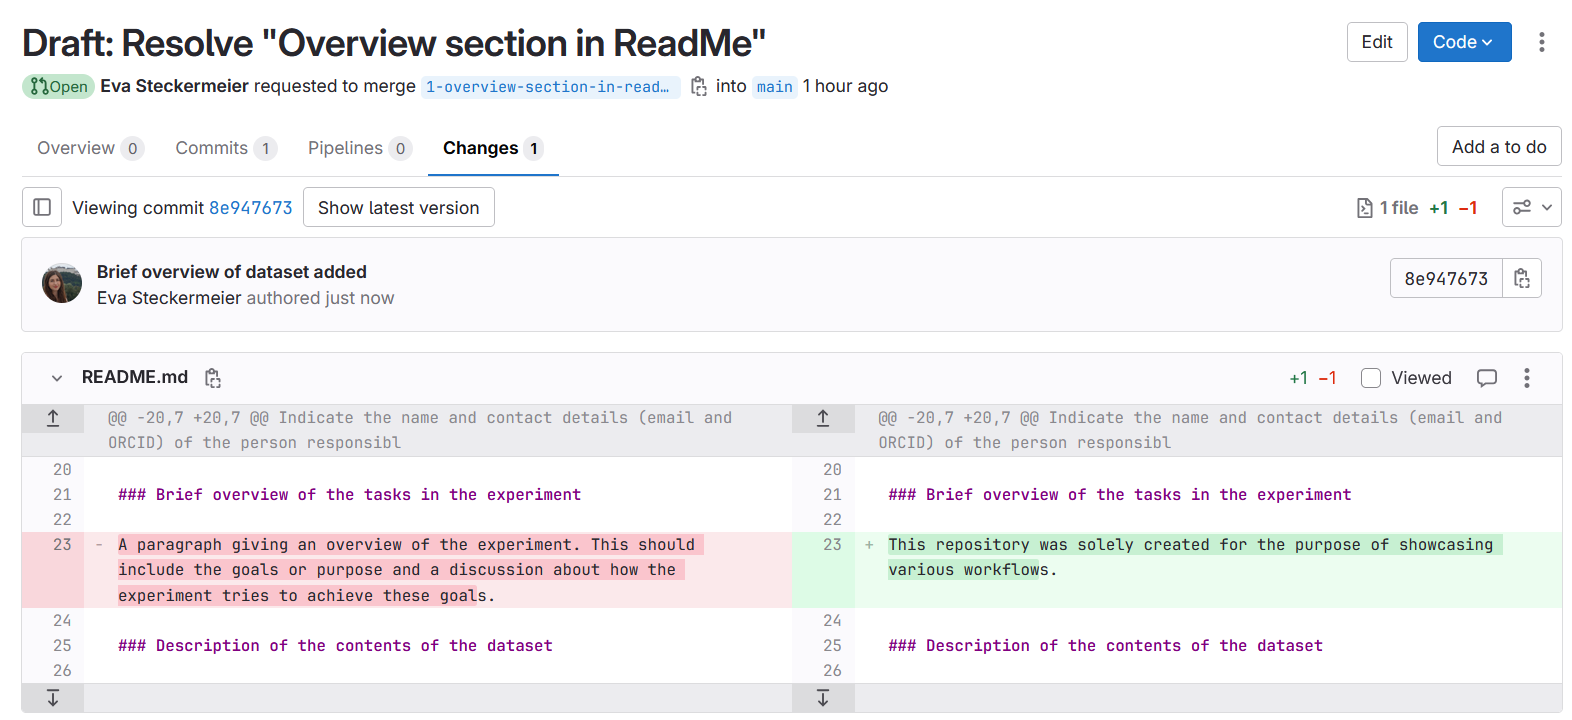
Step 4: View changes
View all changes made in a merge request by navigating to the merge request and selecting Changes.
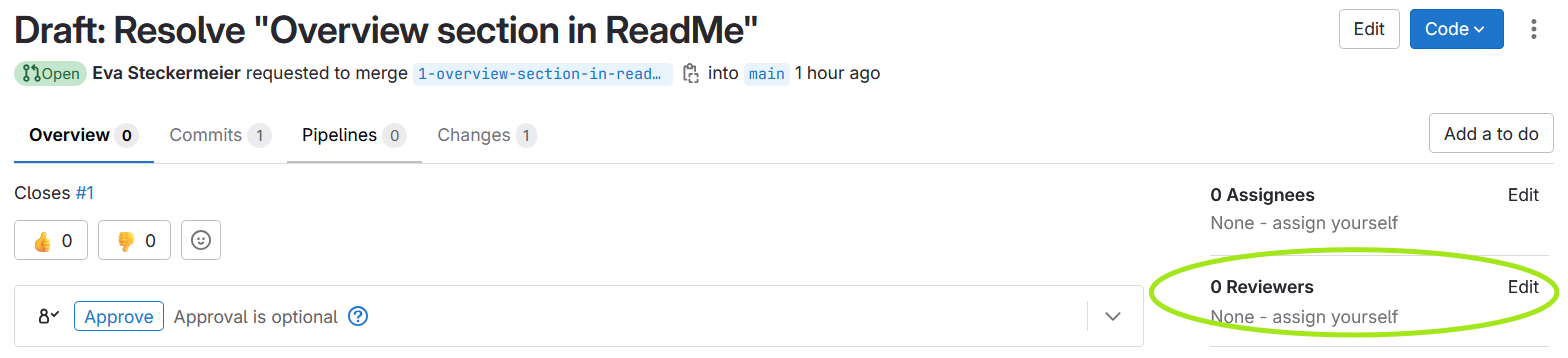
Step 5: Request review and merge
After implementing all changes proposed in the issue, request a review from your data steward by assigning them as reviewer.
The data steward will review your merge request and merge the changes.
Add participant data files
Every dataset is different. To tailor the ANC functionalities to your dataset, the data steward needs to understand your data. Therefore, we divide the process of depositing participant data in two.
Pilot participant
Pick one participant with the most complete data. In this step you add all data relevant only to this participant, including:
- participant data files (excluding phenotype-only datasets): the entire
sub-directory of the chosen participant - participant metadata: one row in
participants.tsvfor the chosen participant and the missing column descriptions inparticipants.json(see your project's issue labeled ANC Task9)
Follow the basic GitLab workflow: create an issue titled e.g. "Pilot participant" describing the expected participant data (sessions, data types, number of scans, participant information), create a merge request, and work locally to add the files.
Mandatory session directories
The ANC requires every participant directory to have at least one session.
After pushing all data files, view the changes in the merge request and request a review from your data steward. Please give your data steward some time to respond. They will ask for potential clarifications, recommend necessary changes, or ask for more pilot participants if necessary.
After completed review, the data of your pilot participant will be merged 
Remaining participants
Continue with this step only after the data of your pilot participant has been merged in.
Follow the same workflow as for the pilot participant. This time you can add the data of all the remaining participants.
Do not add too many participants at once
The ANC can handle large amounts of data. However, to keep the system responsive and simplify the interaction with the data stewards, consider adding the participants in batches.
Questionnaire data
We recommend adding questionnaire data after all participant data has been deposited.
Follow the steps in your project's issue "Add Questionnaire Data" labeled ANC Task45.